
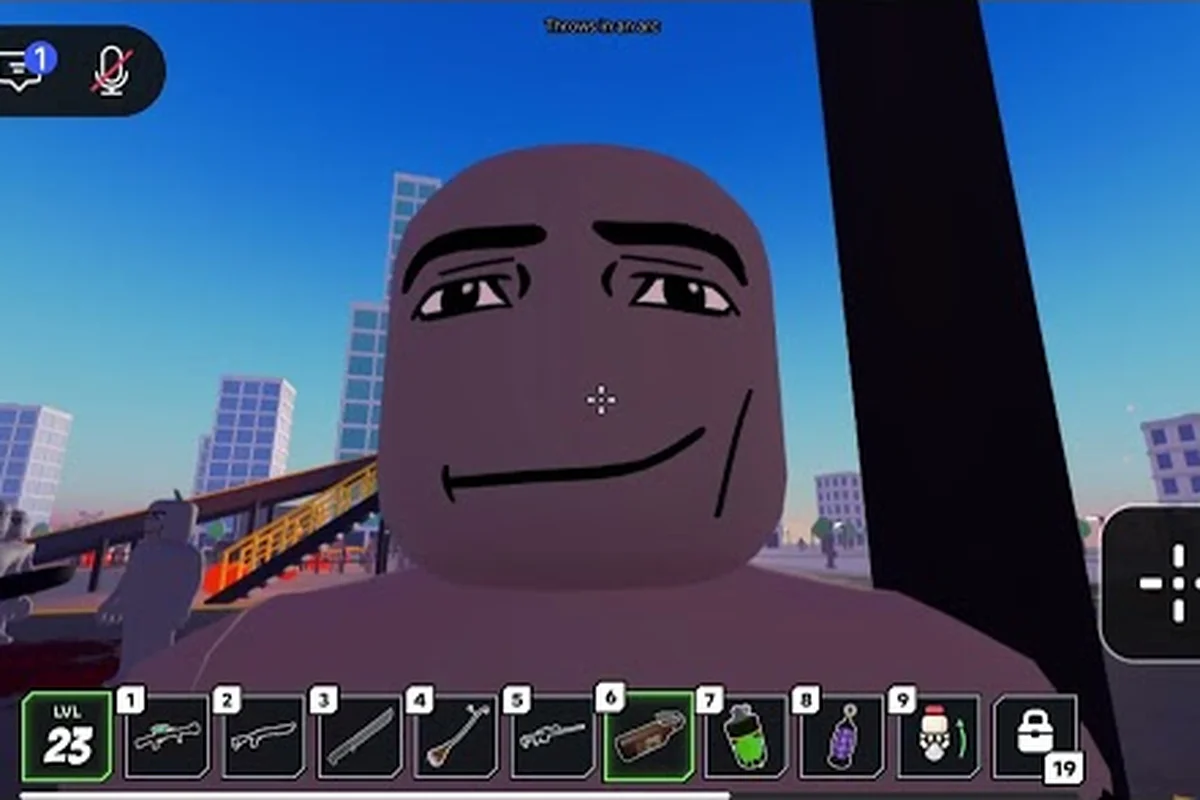
Ragdoll Reality zombie bite mechanics turn each pursuit into a test of spacing and target priority: the three speed classes determine whether you can create distance, while a pounce demands an immediate dodge or block. Limb-based targets add another layer, because damaging a leg can slow a zombie’s chase and buying even a brief opening may be more useful than landing a fatal hit. For example, a fast zombie caught during a pounce can threaten you before a slow one closes the gap, making the zombie chase and bite timing more important than raw attack power.
Zombie Bite Mechanics Overview
The official Ragdoll Reality game page identifies three zombie speed classes: slow, normal, and fast. It also confirms that zombies chase, pounce, and bite, while a bitten dummy becomes infected and can convert others. However, the page does not publish exact health totals, bite damage, attack cooldowns, or wave population limits.
That distinction matters because bite damage is unconfirmed, but the broader attack behavior is documented. A zombie encounter should be treated as a timing problem rather than a simple damage race, especially because the dummy’s separate body parts react independently to grabs, impacts, and dismemberment.
| Documented element | What the official page confirms | What remains unconfirmed |
|---|---|---|
| Speed classes | Slow, normal, and fast | Exact movement speeds |
| Pursuit | Zombies chase targets | Detection range and pathfinding rules |
| Attack | Zombies pounce and bite | Damage, cooldown, and range values |
| Infection | A bitten dummy becomes infected | Infection timer and conversion conditions |
| Horde mode | A Horde button starts wave survival | Spawn caps, intermissions, and rewards |
| Body targets | Dummy limbs react separately | Health, damage, and dismemberment thresholds |
The key takeaway is that speed class, distance, and limb position determine the safest response. Slow zombies give you more time to reposition, normal zombies punish passive movement, and fast zombies can close the gap before a clean escape. For the broader graveyard and Horde overview, see the Ragdoll Reality zombie guide.
Confirmed Features and Unknown Values
Community reports and visual observation can help you recognize patterns, but they should not be treated as exact balance data. As of the official page’s current description, players can confirm the existence of three movement profiles, pounce behavior, and infectious bites. They should not expect an authoritative bite-damage percentage or an exact stun duration.
The best way to test a zombie bite mechanic is through controlled observation: place one infected dummy at a fixed range, let a slow zombie approach, and record whether its pounce ends in immediate contact or leaves a brief recovery window before the infectious bite can land. Repeat the same trial with the faster movement profile, keeping distance and camera angle consistent, so any difference in pursuit speed, contact timing, and bite opportunity reflects the zombie’s behavior rather than player positioning.
-
Record whether the zombie closes distance continuously or pauses before striking.
-
Count how many body-part interactions are needed to stop the pursuit.
-
Notice whether a pounce causes direct contact or creates a short opening afterward.
-
Compare the reaction window of a slow zombie with that of a fast one.
-
Track whether an infected dummy changes the behavior of nearby zombies.
This approach creates useful field data without pretending that unpublished values are fixed. It also explains why a distance-first strategy is safer: staying outside contact range prevents both the zombie pounce and the infectious bite from producing an immediate hit. For example, a player comparing a slow zombie with a fast movement profile can record the first contact distance, the time between pounce initiation and impact, and whether the infected dummy’s condition changes the pursuit pattern. Those observations are more useful than assigning an invented bite-damage percentage or stun duration, because they expose the timing window in which a ragdoll reality zombie chase can be interrupted.
Zombie Chase and Speed Classes
Ragdoll Reality zombie chase behavior appears to be the foundation of the combat system, because every documented attack depends on the zombie reaching its target. The official page separates the enemies into slow, normal, and fast categories, but it does not disclose their numerical speeds. The names therefore tell you the relative threat, while actual movement must be judged in play.
| Speed class | Relative threat | Best practical response | Main mistake to avoid |
|---|---|---|---|
| Slow | Lowest | Create distance and target limbs | Waiting beside it for too long |
| Normal | Moderate | Move laterally and strike from range | Walking backward while staring at it |
| Fast | Highest | Break line, use obstacles, prioritize escape | Treating it like a normal zombie |
| Infected dummy | Variable | Isolate it from other dummies | Leaving it beside a convertible target |
Slow zombies are useful pressure enemies. They allow a player to learn the chase pattern, test grabs, and discover which body interactions produce the largest reaction. They also teach the basic rule of the game: a stopped limb is not necessarily a stopped zombie. Once the enemy falls, its remaining body parts may continue the pursuit.
Normal zombies remove much of that learning time. Their direct approach encourages constant spacing and forces the player to choose between attacking and retreating. Fast zombies make mistakes especially costly because a small delay may allow the enemy to reach the player before another hit lands.
A useful pursuit funnel is to guide the zombie into a long corridor, use a doorway or narrow passage, and attack from an angle that limits simultaneous contact. The official description does not state whether obstacles alter pathfinding, so treat this as a practical positioning tactic rather than a documented rule. The slow zombie analysis examines why a slower enemy is still more than a harmless target.
Reading the Approach
Watch the body’s orientation and the space between you and the zombie. When the enemy advances with a clear line, move away diagonally rather than directly backward. A backward retreat preserves the target in front of you but gives the zombie an unobstructed route. A diagonal move can create more decision time while keeping the enemy visible.
If a zombie falls, do not assume the chase has ended. Dummies can be grabbed, pushed, thrown, and dismembered, and each body part is treated as a separate target. A fallen torso may remain inactive while a detached limb continues moving. Before committing to an attack, check whether the remaining parts are still capable of closing distance.
Close-range contact is a decision point, not a free hit. If a zombie reaches you, changing direction sharply, using a grab, or striking a supporting limb can interrupt the sequence. Since exact stun values are unavailable, test these options and use whichever produces the longest reliable gap in the current wave.
Zombie Pounce and Bite Attack Patterns
The Ragdoll Reality zombie pounce is the quickest documented sign that a chase has become an attack. The official game page names pouncing and biting as separate zombie actions, although it does not explain their exact order, reach, cooldown, or damage. As a result, the safest interpretation is to treat a pounce as the strike phase and a bite as the contact that may cause infection.
A useful attack model has three stages, and the crucial distinction is between the pounce’s commitment and the bite’s possible infection effect. Because the official Ragdoll Reality materials do not publish a pounce reach, bite range, cooldown, or damage value, players should not assign invented timings to these actions. Instead, read the zombie’s movement transition: steady chase behavior can still be countered through distance, but a sudden pounce animation means the attack window has opened. The bite should then be treated as a discrete contact event, especially when a nearby dummy can become infected and continue the threat chain. This uncertainty-aware model makes the documented pounce, bite, chase, and infection mechanics actionable without mistaking speculation for fixed frame data.
-
Approach: The zombie closes the gap while following its speed class.
-
Commit: The body shifts into a pounce, reducing the player’s reaction time.
-
Contact: The zombie bites, potentially infecting a dummy that becomes the next threat.
| Stage | What to watch for | Safer response | Evidence level |
|---|---|---|---|
| Approach | Gradual loss of distance | Begin lateral movement early | Officially confirmed chase |
| Commit | Sudden pounce animation | Interrupt or evade before contact | Officially confirmed pounce |
| Contact | Bite lands on a dummy | Separate it and contain it | Officially confirmed bite and infection |
| Aftermath | Infected dummy remains active | Prioritize containment over damage | Officially confirmed infection |
This model prevents a common error: treating every movement as harmless walking. In ragdoll reality zombie bite mechanics, the most important signal is the change from steady pursuit to a sudden lunge. Once that commitment begins, backing away along the same line may not create enough space.
Why Bites Create a Multi-Threat Problem
A bite is more dangerous than a normal impact because of the infection loop. The official page says that a bitten dummy becomes infected and can convert, so a failed defense can create a second enemy rather than simply reduce the first enemy’s health. This makes the fight around a bite different from a standard damage encounter.
A priority order helps prevent cascading failures: first interrupt the bite, then stabilize the bitten dummy’s condition, and only afterward resume the main Ragdoll Reality zombie chase. For example, if a fast zombie is closing during a bite, breaking contact and creating space can preserve the fight against the original attacker without allowing the exposed dummy to trigger another infection; this sequencing is especially important because the game does not publish a confirmed bite-to-conversion timer or infection radius.
-
Keep distance from the biting zombie.
-
Separate the newly infected dummy from the arena’s edge.
-
Prevent other dummies from entering the infection zone.
-
Reassess whether a fast zombie is approaching.
-
Attack only when a safe window is available.
The game does not publish the infection radius, conversion delay, or whether every bite guarantees conversion. Therefore, do not assume that a single contact is identical to an immediate spawn. Instead, treat the bitten dummy as contaminated until observation shows otherwise.
Bite Range and Position
Exact reach is another missing value, so distance should be managed conservatively. Avoid standing directly in front of a zombie while attacking another target. Its body can turn, and the ragdoll physics can make a committed dummy rotate unexpectedly. A side position gives you more room to react if the zombie pivots or is pushed by another body.
Attack interruption is best tested with a limb. A hand, leg, or other separate part can absorb or redirect a collision, but no official threshold shows which one gives the longest stun. Rotate your targets and observe. One body part may fail while another produces a useful opening, especially after a pounce places the zombie on the ground.
Zombie Attack Targets and Body Mechanics
Ragdoll Reality uses body parts as separate targets, which makes a conventional “empty the health bar” approach less useful. The official page confirms that dummies can be grabbed, pushed, thrown, and dismembered, with each part reacting on its own. It does not provide limb health values, damage thresholds, or dismemberment chances, so the practical goal is interrupting the zombie’s ability to pursue rather than chasing a precise HP target.
| Target | Likely tactical role | Best timing | Unconfirmed element |
|---|---|---|---|
| Legs | Reduce mobility | During approach | Exact slowdown and duration |
| Torso | Main body and contact risk | After a pounce | Exact health pool |
| Arms | Can interfere with grabs or contact | Before close range | Control and stun values |
| Detached parts | May continue ragdoll movement | While reorienting | Whether every part remains active |
| Infected dummy | Possible conversion source | Immediately after a bite | Conversion delay and radius |
Leg-focused attacks make intuitive sense because slowing the body should buy time, and the game’s separate-limb system supports testing that theory. However, treat this as a player-developed tactic rather than a confirmed formula. If a leg impact does not stop the chase, a body or arm hit may produce a better result. The important habit is to test each target under similar conditions.
Exploit the Physics Without Assuming Exact Damage
The value of ragdoll physics is that a successful hit can change the entire encounter, not merely subtract a small amount of health. A push can rotate the zombie, a throw can create distance, and a grab can interrupt a dangerous approach. Since numerical damage is unpublished, prioritize outcomes you can observe:
-
Does the target move away from you?
-
Does the zombie lose its pursuit angle?
-
Is the biting dummy separated from other targets?
-
Does a fallen body part still threaten nearby dummies?
-
Can you complete a second strike before the zombie recovers?
These questions create a reliable decision tree. If the first strike creates distance, follow through with a safe reposition. If it merely turns the zombie, do not stand still for another attack; move around the new facing direction. If a bite has already occurred, stop treating the encounter as a simple finish and contain the infected dummy instead.
The torso is not automatically the best target. It is often the most obvious place to strike, but legs may offer better control of movement, while arms may matter more when a grab threatens you. The three practical zombie-fighting tactics expand on how to combine these physical interactions instead of relying on one repetitive strike.
Zombie Fight Strategies for Horde Mode
A defensive triangle is more reliable in Horde mode than standing in one spot: keep an escape route, watch the fast class, and attack only when a zombie commits to the pounce. The official page confirms that the Horde button starts wave survival, yet it does not publish wave number, intermission, spawn cap, or reward rules. That means a setup should be flexible enough to handle an unexpectedly dense group.
| Situation | Immediate objective | Action sequence |
|---|---|---|
| One slow zombie | Test control safely | Keep distance, strike a limb, retreat |
| One fast zombie | Preserve mobility | Break its line, use open space, avoid static attacks |
| Several normal zombies | Limit simultaneous contact | Move between lanes, prioritize the closest threat |
| Zombie already bit a dummy | Contain infection | Separate the infected body from other targets |
| Dense wave | Reduce incoming pressure | Use obstacles, interrupt pounces, avoid chains of bodies |
Before starting, open the arena and locate at least two usable escape routes. Learn the boundaries of the space, identify narrow passages, and avoid placing your back against a wall. Since the game does not publish spawn caps, a clear area can become dangerous quickly, and the ability to redirect a group matters more than a single impressive attack.
Bite-Counter Sequence
Treat the encounter as a decision cycle rather than a single target: each ragdoll reality zombie pounce attempt signals a temporary opening, but only after the fast zombie commits. Use that commitment window to reposition, and remember that a ragdoll reality zombie bite can redirect the threat instead of ending it. If the attacked limb survives, it may continue pursuing independently, so confirm that it is no longer active before engaging the next target.
-
Scan: Identify the nearest fast zombie, the nearest infected dummy, and the next open route.
-
Create space: Move laterally or behind an obstacle before a fast enemy reaches the pounce range.
-
Interrupt: Strike a limb or use a grab during the zombie’s commitment phase.
-
Reset: Retreat, verify that the body part is no longer pursuing, then reassess the group.
This loop prevents panic damage. In ragdoll reality zombie fight situations, attacking the nearest body without checking for a fast zombie can leave you surrounded, while chasing a fallen limb may allow a second enemy to close from behind. The priority is always to preserve a workable route.
Use Slow Zombies as Practice
A slow zombie is useful for learning the attack loop because its slower pursuit gives you more time to observe the windup and recover from mistakes. Practice changing targets, interrupting with a grab, and rotating away after a hit. Once the sequence becomes familiar, apply the same routine against normal and fast classes.
The official description does not disclose difficulty modifiers for each wave, so do not assume the first slow encounter and a later wave have identical pressure. Check the Horde mode setup guide for the documented button-based entry method, then return to the arena with the space-control plan above.
Zombie Tips for Defensive Positioning
The best Ragdoll Reality zombie tips combine confirmed behavior with cautious assumptions. Confirmed facts are the three speed classes, chasing, pouncing, biting, infection, separate body-part reactions, and the Horde button. Unconfirmed details include damage values, stun lengths, exact range, infection timing, wave populations, and rewards. Keeping that boundary clear helps you adapt instead of building a plan around invented numbers.
| Priority | Action | Reason |
|---|---|---|
| 1 | Keep open space | Fast zombies can punish late reactions |
| 2 | Watch for pounce commitment | It signals a sudden attack phase |
| 3 | Contain bitten dummies | Infection can extend the threat |
| 4 | Test separate limbs | Targets may produce different control effects |
| 5 | Avoid static attacks | A committed zombie can still pounce while you strike |
| 6 | Recheck after each hit | Physics can redirect the encounter instantly |
Keep one escape line open. Even a slow zombie can create a chain reaction when other bodies push it, and a fast zombie may convert that blocked route into a pounce. Position yourself so that retreat does not require passing through a crowd of moving dummies.
A second useful habit is to use corners deliberately rather than accidentally. A narrow passage can slow several enemies at once, but it can also trap you if the path fills. Fight near a corner only when you can still step sideways or reverse direction, and do not stand exactly at the point where the wall prevents escape.
Finally, let the body react around you. If a zombie is already falling, spending another action on the same target may be less valuable than moving it away from other dummies. A shove into open space can solve an immediate problem, while a damaging strike may not stop the nearest limb. The goal is control of space and threat count, not simply the largest visible impact.
Confirmed Facts Versus Community Interpretation
Player experience is valuable for reading animations and testing body-part interactions, but the available official material does not support exact balance claims. According to the official game page, the Halloween update introduced graveyard conversion, the three speed classes, infection, and Horde mode. It also notes weekly updates, but no versioned changelog or dated patch archive is provided.
| Claim | Confidence | Safe conclusion |
|---|---|---|
| Zombies can chase | Confirmed | Pursuit is a core behavior |
| Zombies can pounce | Confirmed | Treat sudden lunges as attack commitments |
| Zombies can bite | Confirmed | Contact can create infection |
| Fast zombies are numerically faster | Confirmed by class name | Exact multiplier is unknown |
| A bite always instantly converts | Not confirmed | Treat infection as a risk, not a fixed timer |
| Leg hits always stun the longest | Not confirmed | Test targets and keep what works |
| Horde waves follow a known pattern | Not published | Adapt to each wave you observe |
Community reports should be used as observations, not authority. If players report that fast zombies tend to close distance quickly or that a limb can interrupt a pounce, those reports can guide a session, but they should still be checked against the current build. The game launched on October 13, 2026, and weekly updates may change animations, conversion behavior, or wave composition without a public version number.
Version-sensitive timing deserves special caution. A timing that works today may become less reliable after an update, so test the three speed classes and the infection response again whenever the game changes. The official page’s lack of detailed numbers makes direct experimentation more dependable than remembering a fixed strategy from an earlier session.
Frequently Asked Questions
Can Ragdoll Reality zombies infect other dummies?
Yes. According to the official game page, a dummy bitten by a zombie becomes infected and can convert. The exact conversion delay, radius, and activation conditions are not published, so contain the bitten dummy and treat infection as a developing threat rather than assuming an immediate result.
Are fast Ragdoll Reality zombies always harder to fight?
They create the shortest reaction window because the official game identifies fast as one of three speed classes. The page does not disclose exact speed or attack values, so difficulty also depends on the situation. Open space, obstacles, and early pounce detection can make a fast zombie manageable.
Does damaging a limb stop a zombie completely?
Not necessarily. The game treats body parts as separate targets, but exact health, stun, and dismemberment thresholds are not published. A leg impact may reduce mobility, while another part may continue acting. Test different targets and check the remaining body before assuming the threat is gone.
Should players attack during a zombie pounce?
A pounce signals that the chase has entered its attack phase, so creating space before contact is safer than standing still. If you are already close, use a grab, limb impact, or sharp directional change to interrupt the sequence. Exact attack recovery timing is unconfirmed, so avoid relying on one fixed window.
What is the safest way to handle a Horde mode wave?
Keep an escape route, watch for fast zombies, and attack during controlled openings rather than in the middle of a crowd. Isolate any dummy that has been bitten so infection does not spread through the arena. The Horde button is confirmed, but wave counts, spawn limits, and rewards are not documented.
Ragdoll Reality zombie bite mechanics reward spacing, target selection, and fast recognition of the pounce. By treating slow, normal, and fast zombies differently, containing infection, and using the game’s separate body-part reactions, you can turn chaotic encounters into a repeatable defensive fight.