
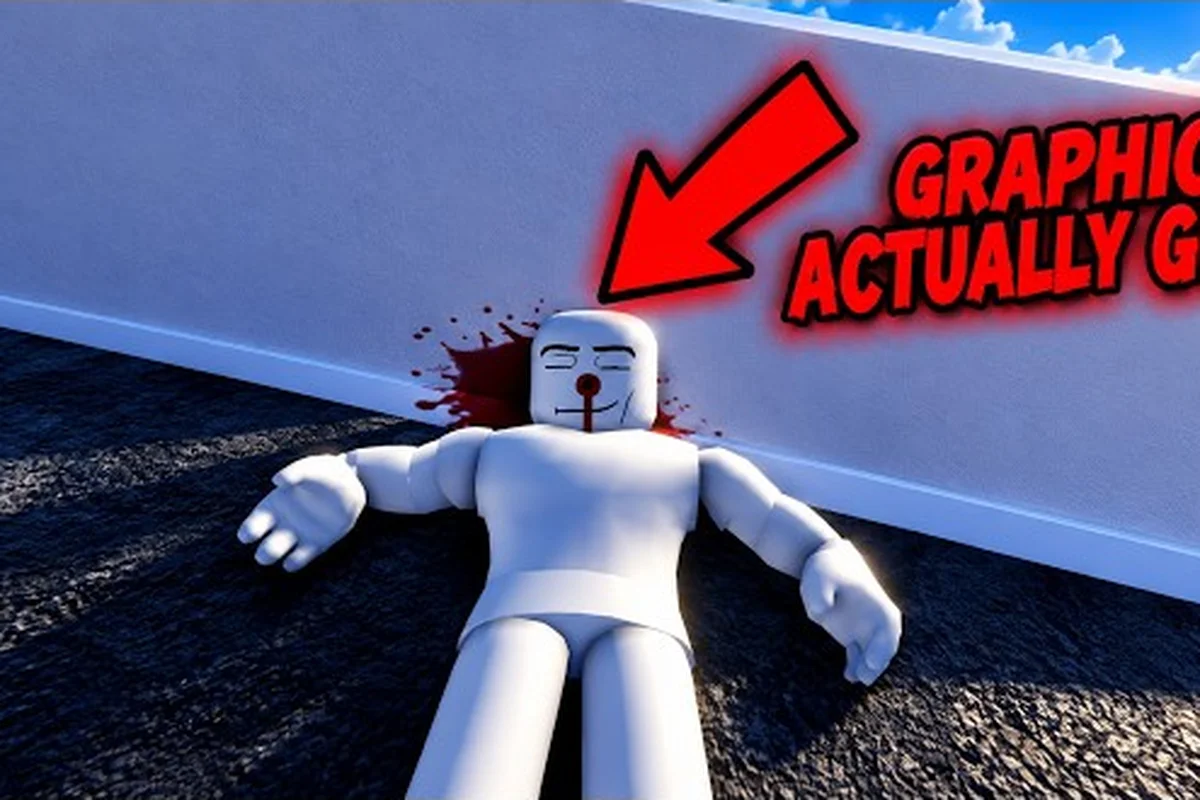
Learning where to start in Ragdoll Reality matters because its best feature is physical hit location, not a simple damage counter. The official Ragdoll Reality game page describes dummies that react to the exact spot struck, so a deliberate first hour will teach you more than random swinging.
How to Start With a Clear Objective
Your first goal is not to defeat a boss or maximize a score. It is to understand the game’s central loop: choose a dummy, test a weapon, observe the body’s reaction, then repeat with a different hit location. Ragdoll Reality rewards that process because the official page describes arms that hang after being struck, legs that produce limping or crawling, and dummies that can stagger, fight back, run away, and recover.
That makes a ragdoll reality how to start approach simple: treat the first session like a controlled experiment. You will quickly learn which tools are accurate, how far the dummy can move, and whether a direct hit is more useful than a risky swing.
| First-hour goal | What to practice | Success signal |
|---|---|---|
| Understand hit locations | Arms, legs, torso, head | You can predict the dummy’s reaction |
| Learn weapon handling | Equip, aim, strike, recover | Fewer missed swings |
| Observe dummy behavior | Stagger, counterattack, retreat, recovery | You recognize each response |
| Test the environment | Playground hazards, 80-stud tower | You know which areas to revisit |
| Try the Halloween layer | Graveyard conversion, Horde mode | You can handle a moving target |
The Three-Minute Opening Routine
Begin by choosing a stationary dummy and equipping one weapon you already understand. A pistol offers a clean way to test precise placement because you do not need to crowd the target. Fire once at the torso, once at an arm, and once at a leg, pausing after each hit to observe the full reaction.
Next, swing the same weapon twice and compare the results. This establishes the difference between a deliberate strike and a rushed one. You are learning timing as much as damage, because a missed blow may allow the dummy to stagger, pursue you, or retreat.
After the weapon test, walk toward the playground hazards and the 80-stud tower, which are identified as early-session locations on the official page. Do not treat them as mandatory challenges yet. Their purpose is to show you how movement and vertical space change a fight before you become invested in the sandbox.
What You Should Notice Immediately
The location-based reaction system is the defining mechanic. A leg hit can leave the dummy limping or crawling, while an arm hit can make it clutch the affected area. Limbs can also come off, and wounds can bleed, which gives each strike a physical consequence beyond a standard health bar.
A useful first-session rule is to stop after every meaningful hit and ask three questions: Where did the weapon land? Which body part responded? Did the dummy continue acting? This observation habit prevents the common mistake of treating every target like a stationary punching bag.
First-Hour Guide: Test Weapons Without Losing the Lesson
Your weapon choice should support observation rather than maximum spectacle. Start with a familiar ranged option, then test one melee weapon. If you want a deeper look at available tools, the Ragdoll Reality all-weapons overview can help you compare the roster before experimenting.
| Test phase | Recommended action | What you learn |
|---|---|---|
| Accuracy test | Use a pistol against stationary targets | Hit placement and recovery time |
| Reach test | Swing a melee weapon at different ranges | Reliable distance and attack arc |
| Control test | Mix light and heavy impacts | Balance between power and control |
| Pressure test | Hit a reacting dummy | Whether your timing survives movement |
| Recovery test | Strike after the dummy rises | Punish windows and chase behavior |
Phase One: Use a Pistol as a Teaching Tool
Pistol testing provides quick feedback because each shot produces a clearly placed impact. Start with the torso, then move to the arms and legs without standing inside the dummy’s reach. Notice whether the target reacts before falling or whether it returns to a stable position.
The official game page identifies maximum server capacity as one player and does not list VIP servers, so this is a single-player sandbox as of October 25, 2026. You do not need a partner to learn the mechanics, and failures can be treated as useful tests rather than failed cooperative runs.
If your aim feels inconsistent, the Ragdoll Reality pistol guide focuses on range and control. Use it to establish a basic rhythm: aim, fire, watch, reposition, and fire again. Precision matters more than firing continuously.
Phase Two: Try One Melee Weapon
Once your pistol shots are landing consistently, equip a melee weapon and approach more cautiously. A blade, axe, or other striking tool should be treated as a positioning tool, not merely a stronger attack: reach determines which limbs you can target, while recovery speed affects how long you remain exposed after a swing. For example, a short-reaching weapon lets you pressure an enemy at close range but gives less room to react to a counterattack, whereas a longer weapon preserves space but requires more accurate timing. Compare each tool by the distance it creates, the timing of the strike, and the risk of being grabbed or staggered.
For example, a short-reaching weapon may encourage direct pressure, while a longer weapon may let you strike from outside immediate danger. Test each against a dummy that is already staggered and against one standing normally. If the weapon guide covers that tool in detail, the Ragdoll Reality machete timing guide is a useful reference for controlled limb strikes.
Do not chain every mechanic immediately. Start with ten deliberate swings, record whether each hit connects with the intended limb, and note the weapon’s recovery window after impact. Then change only one variable—such as reach, strike timing, or approach angle—before repeating the set. A controlled comparison reveals whether a miss came from positioning, the swing arc, or the enemy’s stagger state, while preventing fatigue, loss of balance, and recovery downtime from making the result look random.
New Player Guide to Location-Based Damage
Targeting is the skill that carries forward into every later activity. A hit to the same general area should not be treated as interchangeable, because the official description says the reaction depends on where the blow lands. Build a mental map of the head, torso, arms, and legs, then test how each region changes movement.
| Target area | Observed reaction described by the official page | Practical benefit |
|---|---|---|
| Arm | The arm may hang; the dummy may clutch the wound | Temporary reduction in one side’s usefulness |
| Leg | The dummy may limp or crawl | Slower movement and easier positioning |
| Torso | Central impacts can cause a strong stagger | Creates an opening for another strike |
| Head | Head impacts may produce a sharper disruption | Useful for a finishing attempt |
| Detached limb | Limbs can come off during the sandbox | Visible evidence of successful targeting |
Use the Body as a Practice Target
Stand close enough to identify the body area, but remain far enough to observe the response. Start with low-risk targets: the torso offers a broad reference point, arms show whether small placement changes matter, and legs reveal how movement is affected.
Next, create a sequence rather than a single strike. Use a torso hit to produce a stagger, follow with an arm strike, and finish near a leg. This teaches you to observe whether the dummy falls, crawls, retreats, fights back, or gets up. The sequence itself is more valuable than the final blow because it trains reaction recognition.
If an accidental limb removal or heavy bleeding occurs, reset the encounter and repeat the same torso-to-arm-to-leg sequence without carrying the previous result forward. This matters because ragdoll physics can vary with the dummy’s starting balance, collision angle, and momentum, so a clean reaction may be a one-time fluke rather than a repeatable result. Compare at least two runs and note whether the same limb detaches, whether the dummy enters the same ragdoll state, and how quickly the bleed effect resolves; those observations are more useful for learning the physics than the first outcome alone.
Learn the Four Main Dummy Behaviors
The official page identifies four important behaviors: staggering, fighting back, running away, and getting back up. A new player should recognize all four because each demands a different response, and the dummy’s reaction can change mid-encounter—for example, a successful stagger may briefly interrupt an attack, but a target that keeps standing can start counterattacking once its recovery ends. Treat these reactions as live combat cues rather than scripted stages: watch the dummy’s balance and weapon movement, then decide whether to maintain pressure, create space, or reposition before the next hit lands.
-
Staggering creates the clearest opening, so follow with accuracy rather than excessive force.
-
Fighting back means you need distance or another approach; standing still can waste a strong first hit.
-
Running away tests whether you can reposition and control the chase instead of waiting for another free shot.
-
Getting back up means a downed dummy is not a finished encounter, so plan a follow-up rather than turning away.
Track which reaction appears most often with your chosen weapon, since dummy behavior determines your next movement. If the dummy retreats repeatedly, shorten the gap with controlled forward movement instead of sprinting into its weapon arc. If long recovery windows are common, use that opening to line up a precise body-target hit; the trade-off is that forcing an extra swing may produce a counterattack during the dummy’s animation recovery.
First-Hour 2026 Guide
The official page lists roughly 9.55 million visits, about 55,700 concurrent players, and 34,700 favorites on October 25, 2026, with a listed like-to-dislike ratio of approximately 9,761 to 2,142. These figures explain why the opening sandbox can feel busy even though each server supports only one player, but they do not change the core learning plan.
| Official-page data point | Listed value | Why it matters to a newcomer |
|---|---|---|
| Total visits | About 9.55 million | The game has a large audience |
| Concurrent players | About 55,700 | Expect visible activity around the experience |
| Favorites | About 34,700 | Strong interest in the sandbox |
| Likes | 9,761 | Favorable overall reception |
| Dislikes | 2,142 | Not universally appealing |
| Maximum players per server | 1 | Every session is designed for solo play |
| VIP servers | Not enabled | A private-server strategy is unavailable |
The Optional Halloween Layer
The official page also describes a graveyard where a thrown dummy can become a zombie. Zombies come in slow, normal, and fast speed classes, and they can chase, pounce, and bite. A bitten dummy may become infected and convert others. A Horde button starts wave-survival mode, although the page does not publish exact zombie health, bite damage, or wave size.
Because the Horde option and graveyard conversion are not presented as gated behind a published level or currency requirement, a curious new player may test them during the first session. Keep that optional. A zombie that pounces is a more complex target than a stationary dummy, so finishing the basic body-location lessons first gives you a better foundation.
| Optional activity | Published information | Sensible first approach |
|---|---|---|
| Graveyard | A thrown dummy can become a zombie | Learn the conversion without surrounding yourself |
| Zombie speeds | Slow, normal, and fast | Observe behavior before changing targets |
| Zombie actions | Chase, pounce, and bite | Preserve space for a reaction |
| Infection | A bitten dummy can become infected | Avoid prolonged contact |
| Horde mode | Starts a wave-survival session | Attempt after testing basic reactions |
Keep Your Expectations Matched to the Published Information
Not every number is available, and the official page does not list zombie health totals, exact bite damage, or the size of a Horde wave. Do not treat online estimates as confirmed values. For a clean ragdoll reality 2026 guide, separate published facts from personal observation: the speed classes and actions are confirmed, while specific damage and timing may vary by version or testing conditions.
This distinction also applies to weapons. The official page supports the general combat loop and location-based reactions, but it does not provide a complete numerical damage table. Use the sandbox to compare consistency, reach, and recovery rather than assuming one weapon is universally superior.
Practical First-Hour Plan and Improvement Routine
A structured session prevents the common beginner mistake of repeatedly swinging at a dummy without learning anything. Follow this sequence, and pause to reset whenever your objective drifts. For broader first-session fundamentals, the Ragdoll Reality Roblox guide provides additional details about the basic sandbox layout.
| Time | Activity | Specific goal |
|---|---|---|
| Minutes 0-5 | Stationary dummy and pistol | Learn precise torso, arm, and leg placement |
| Minutes 5-12 | One melee weapon | Compare reach, speed, and consistency |
| Minutes 12-20 | Responding dummy | Identify stagger, retreat, counterattack, and recovery |
| Minutes 20-30 | Playground hazards | Learn how environmental tools affect movement |
| Minutes 30-40 | 80-stud tower | Practice changing elevation and angle |
| Minutes 40-50 | Graveyard and zombies | Test movement against a pursuing target |
| Minutes 50-60 | Horde mode or repeated drills | Consolidate your strongest weapon routine |
A Repeatable Four-Step Attack Drill
Use this drill with any weapon: approach, read, strike, and recover. Approach from a controlled angle so the dummy cannot easily close the distance. Read its current state and choose a body target. Strike once, then reset your position before the reaction develops.
Recovery is the step beginners often skip. A successful hit may be followed by a counterattack, an escape, or a rapid stand-up, so do not remain in the same spot after impact. Compare your recovery timing against the dummy’s response, then repeat with a different target area.
Keep a simple record of three details: weapon, target area, and observed result. After ten attempts, you should be able to identify a reliable opening. If most swings miss, shorten the distance or use a more accurate tool. If hits land but reactions become confusing, slow down and deliberately label each body region.
Avoid These First-Session Mistakes
The most common mistake is assuming the strongest weapon matters more than contact quality. Another is standing too close after a hit, which gives a reactive dummy time to counter. A third is running immediately to the graveyard or Horde mode before understanding the basic response system.
Other habits waste time: swinging during recovery animations, treating every dummy as identical, and changing weapons after every failed attempt. Use the Ragdoll Reality beginner-mistakes guide to compare your habits with avoidable errors, but diagnose the cause rather than changing everything at once.
The best first-hour goal is consistency, not maximum damage. Complete a controlled first session of ten deliberate strikes, then note the dummy’s main reaction after each hit, whether it staggers, recovers, or counters, and identify which weapon you controlled most cleanly. For example, if switching weapons leaves your timing inconsistent, keep one loadout active for the next run; if the dummy counters after close-range contact, create more distance and test the same strike pattern again. This baseline makes later weapon comparisons, timing adjustments, and Horde-mode preparation measurable.
Frequently Asked Questions
What should I do first in Ragdoll Reality?
Start with a stationary dummy and a weapon you can control. Fire or swing once at the torso, arm, and leg, then pause to observe the resulting reaction. This establishes the location-based system before you face moving zombies, environmental hazards, or Horde mode.
Is Ragdoll Reality better played alone or with friends?
The official page lists a maximum server capacity of one player and does not list VIP servers as of October 25, 2026. You can still invite friends to join informally, but the gameplay is designed around a solo sandbox session rather than coordinated multiplayer objectives.
Which body part should beginners target first?
Start with the torso because it provides the broadest reference point, then test arms and legs to see how the dummy reacts. Head hits may deliver a sharper disruption, but precise placement and safe spacing matter more than rushing toward a dramatic finish during your first session.
Can I try the graveyard and Horde mode immediately?
Yes, the official page does not list a published level or currency gate for either feature. However, learn the basic dummy reactions first because zombies can chase, pounce, and bite, while exact zombie health, bite damage, and wave population are not published.
What is the best way to improve at Ragdoll Reality?
Repeat short, controlled drills instead of swinging continuously. Choose one weapon, one target area, and one clear objective for ten attempts, then review the dummy’s response. Gradually add movement and more advanced targets once you can land deliberate hits and recover safely.