
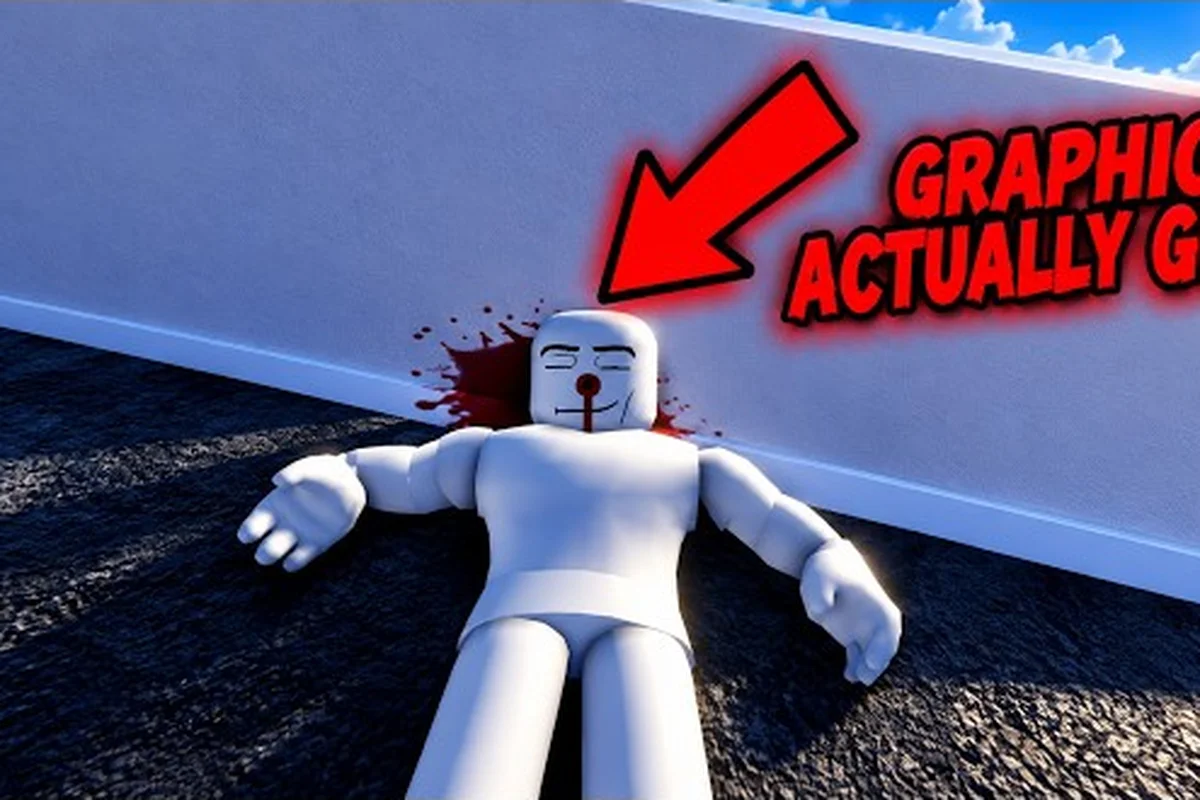
Ragdoll Reality getting started matters because its location-based damage rewards precise solo practice. Learn how hit registration depends on the targeted body zone, compare melee reach against firearm accuracy, and build a safe first session by testing low-risk encounters before committing to longer runs. A useful early drill is to track where each successful hit lands, whether a weapon’s spread suits close quarters, and how enemy momentum changes your spacing, so you can survive your first survival scenario while improving accuracy.
Getting Started: Build a Strong First Routine
A useful first session should answer three questions: where can you test safely, how does the game register a hit, and what happens when a dummy fights back? Ragdoll Reality is built around physics-based interaction rather than a fixed combat tutorial, so learning through controlled experiments gives you a much better foundation than repeatedly trying every available action.
The official Ragdoll Reality game page describes a single-player sandbox with a maximum of one player. That makes a solo guide especially practical: you can test attacks without coordinating with a team, pause to evaluate the result, and safely repeat the same movement until you understand it.
A repeatable opening checklist
Start with a controlled sequence rather than wandering into every available area immediately. For your first solo session, establish a repeatable baseline in one compact test area: make one clean body strike, record the dummy’s limp, arm clutch, stagger, and recovery, then repeat the same input to separate stable physics from a lucky contact. This approach isolates location-based reactions before weapon handling, foot placement, turning, and knockback complicate the results. The dummy test in the first-session table is the clearest starting point because it gives you a visible cause-and-effect loop without enemy pressure, letting you refine timing before progressing to a familiar weapon or a playground hazard.
-
Select a stationary dummy to establish how the game responds to a clean strike.
-
Aim for a specific limb and observe whether the reaction matches the contact point.
-
Try one familiar weapon, recording how quickly it swings, lands, and recovers.
-
Visit a playground hazard only after you understand the basic attack rhythm.
-
Save the tower and graveyard for later tests when mobility and timing are more consistent.
This ragdoll reality getting started routine keeps every experiment small enough to evaluate. It also prevents the most common early mistake: changing weapon, target, and movement at the same time, which makes it difficult to identify what actually produced the result.
| First-session phase | Main objective | What to observe |
|---|---|---|
| Dummy test | Learn location-based reactions | Limp, arm clutch, stagger, recovery |
| Weapon test | Compare handling | Swing speed, reach, recovery |
| Movement test | Control spacing | Foot placement, turning, knockback |
| Hazard test | Practice risky interactions | Recovery time and safe distance |
| Survival test | React to active enemies | Attack windows and escape routes |
Measure results, not just damage
A large reaction does not always mean that an attack is efficient. A hit to the leg can reduce mobility without producing the largest impact, while a precise arm strike may interrupt an enemy’s behavior. Because the official page identifies location-based reactions, your notes should record contact location, enemy response, and recovery time rather than only the apparent size of the hit.
That approach also makes this a useful ragdoll reality single player guide. Solo play gives you time to compare a reliable sequence with a risky sequence without another player rushing you or changing the target. The goal is not to memorize one universal combo; it is to recognize which attacks work against moving, recovering, or attacking dummies.
Location-Based Hits and Dummy Reactions
Location-based damage is the foundation of Ragdoll Reality getting started. The official page explains that a leg hit can leave a dummy limping or crawling, while an arm hit can make that arm hang and cause the dummy to clutch the wound. These are not cosmetic variations: they give you useful ways to change an opponent’s behavior.
Read the body, not the center
Beginners often aim at the torso because it is the largest visible target. That works for learning basic timing, but it ignores the control offered by limb targeting. Treat the body as a set of functional targets: legs affect movement, arms affect interaction, and the torso remains a dependable central option when your aim is still developing.
| Contact point | Likely result | Practical use |
|---|---|---|
| Leg | Limp, crawl, or reduced mobility | Slow a moving target |
| Arm | Arm hangs; dummy may clutch wound | Interrupt an active response |
| Torso | General hit reaction | Learn range and timing |
| Head area | Reaction varies by test | Observe rather than assume |
| Detached limb | Severe physical change | Test consequences after repetition |
When a dummy reacts differently to the same body region, repeat the test with a different weapon or angle. Player experience suggests that distance, swing arc, and approach speed can change the exact reaction, so an isolated hit does not establish a permanent rule.
Keep the first comparison controlled
Make two tests that differ in only one variable. For example, compare a wide swing at mid-distance with a controlled thrust at the same distance. If the second hit reaches the intended target while the first passes above it, the problem is aim rather than raw power.
Make two tests that differ in only one variable: at the same mid-range distance, compare a wide swing with a controlled thrust, keeping the same target area and approach route unchanged. If the thrust lands on the intended target while the swing passes above it, your issue is aim or hit alignment rather than raw power; if both miss, adjust your weapon handling or recovery timing before increasing difficulty. This is especially useful for solo survival because a controlled hit preserves space for the ragdoll physics to settle, while an overpowered swing can leave you exposed during the attack animation.
-
Choose one target area.
-
Keep the approach distance consistent.
-
Record the immediate reaction.
-
Watch the target for several seconds afterward.
A ragdoll reality survival guide should distinguish between control damage and emergency damage. Control damage makes an enemy easier to manage, while emergency damage may stop a threat quickly but can leave you exposed during recovery. Since weapon statistics are not fully published on the official page, direct testing is more reliable than assuming a larger-looking weapon always solves the encounter.
For a more compact introduction to the same systems, the Ragdoll Reality Roblox guide provides useful first-session context without replacing the controlled testing process. Use it to identify ragdoll triggers, weapon handling, and early encounter patterns, then return to the same target area for a repeatable comparison. This keeps a solo survival run focused: if a controlled thrust produces a stable knockdown while a wide swing causes a longer ragdoll transition, adjust the attack timing before increasing difficulty.
Solo Weapon Experiments That Reveal Real Differences
A ragdoll reality solo guide should treat weapons as experimental tools rather than permanent upgrades you must master immediately. The official page references named weapons you already own, so your first goal is to determine how they behave in motion, not to unlock every possible option at once.
Separate reach from accuracy
Long reach can sound safer, yet a wide arc may travel farther before connecting. A shorter weapon can be easier to direct when the target moves unexpectedly. Compare each option using the same dummy position and the same approach, then note the smallest movement that produces a reliable hit.
| Test category | Question to answer | Best measurement |
|---|---|---|
| Reach | How far can the attack connect? | Distance from contact point |
| Accuracy | Does it reach the intended limb? | Target selected before swing |
| Speed | How quickly does the attack arrive? | Time between input and contact |
| Recovery | Can you reposition afterward? | Delay before the next action |
| Control | Can you interrupt movement? | Enemy response after contact |
For exact handling advice, compare the pistol aiming guide with a close-range weapon. The comparison helps you understand whether your difficulty comes from aiming, timing, or the need to remain close to a reactive dummy.
Test weapons in this order
Begin with a weapon whose control you understand. Make several deliberate strikes without attempting to kill the target. Next, change only the target location. Afterward, introduce a small amount of movement, and only then test against a dummy that fights back.
This sequence reveals weaknesses in your technique. If accuracy drops when you move, keep the weapon and use slower positioning. If your aim is consistent but the enemy closes the gap, prioritize spacing. If the weapon recovers slowly, begin learning escape routes instead of trying to chain every attack.
The broader Ragdoll Reality weapon roster can be useful for planning later tests, but the official material does not publish enough numerical detail to rank every option responsibly. Treat community observations as experimental leads, then confirm them in controlled encounters.
Recognize useful outcomes
A good weapon is not always the one that creates the biggest reaction. A tool that reliably interrupts a charging dummy may be more valuable than a heavier attack that connects only after you enter dangerous range. Your first-session goal is to find one dependable option for movement control and another for immediate defense.
Movement, Spacing, and Defensive Survival
Knowing what to survive is only half of a ragdoll reality survival guide; knowing how to avoid the hit is the other half. Dummies can stagger, retaliate, retreat and rise again according to the official page. That makes spacing, exit routes, and attack recovery central to your first session.
Learn the danger triangle
Before every exchange, identify your target, your closest obstacle, and your preferred escape direction. This prevents you from backing into a wall or stepping directly onto the playground hazards. Keep one open lane behind you and avoid committing to a swing when that lane has already closed.
| Survival condition | Risk | Better response |
|---|---|---|
| Target is close | Reduced reaction time | Create distance before attacking |
| Target is against a wall | Limited retreat angle | Circle away from the obstacle |
| Target recovers quickly | Missed window | Use a controlled hit, then reset |
| Player movement is clumsy | Knockback pushes toward danger | Approach at a slower pace |
| Multiple enemies appear | Split attention | Prioritize the nearest threat |
Use a three-step survival cycle
The cycle begins with create space, because walking directly toward an aggressive dummy can turn a harmless test into a damaging collision. Next comes commit once: make one purposeful strike when the target’s movement creates an opening. Finally, recover or retreat by moving away before another attack.
This survival cycle is deliberately conservative, especially while you are learning the controls, reading the dummy’s attack wind-up, and discovering how knockback can interrupt a follow-up strike. For example, if a punch sends the target backward, move only one safe step away rather than sprinting into a second collision; this preserves room to react while keeping the opponent in range. As your timing improves, shorten that recovery step and use the retreat phase to line up the next commit once strike instead of abandoning the three-step structure.
Keep a recovery checkpoint
A recovery checkpoint is simply a safe spot where you can regain control without being pressured. It may be near the edge of a playground or another area with enough room to circle. Returning to that position after a failed attack helps you learn from mistakes without turning one poor exchange into a longer chain of damage.
Player experience supports using dummies as moving practice targets only after basic contact tests. A dummy that gets back up can teach reaction timing, but chasing it across uneven terrain adds variables that may obscure the lesson. When your goal is control, use a stationary target; when your goal is avoidance, use an aggressive one.
A Practical First-Session Plan
Turning mechanics into a schedule prevents a productive ragdoll reality getting started session from becoming random. The official page indicates that a practical loop moves from dummies to weapons, playground hazards, and the 80-stud tower, with the graveyard and Horde button available as additional content.
Spend the first block on clean tests
Begin with stationary dummies and record three successful examples of each weapon or target area. Keep the session low-pressure at first because accuracy, not endurance, is the primary lesson. When an attack fails, pause and identify the cause: incorrect range, rushed movement, poor aim, or a crowded angle.
| Phase | Suggested length | Objective | Completion signal |
|---|---|---|---|
| Baseline dummy test | 5–8 minutes | Learn contact reactions | Consistently target a chosen limb |
| Weapon comparison | 8–12 minutes | Compare reach and recovery | Identify one dependable tool |
| Moving target test | 8–10 minutes | Practice timing | Land hits after changing direction |
| Hazard practice | 5–8 minutes | Learn safe interactions | Enter and leave without panic |
| Tower or Horde | 10+ minutes | Test survival pressure | Retreat successfully at least once |
Treat the suggested durations as training windows rather than hard limits, so a controlled test can expand if a movement issue still needs work, but the session should not allow one activity to consume everything. For example, cap the 80-stud tower at about 10 minutes and use it to test vertical movement, footing, and recovery after a fall; the graveyard and Horde are better for measuring zombie pressure and retreat timing. If you cannot retreat cleanly before your health or stability is exhausted, shorten the next attempt and return to the baseline dummy test to correct the underlying cause.
Treat the graveyard as a conversion zone
The official page says that throwing a dummy into the graveyard converts it into a zombie. Zombies come in slow, normal, and fast speed classes, and they can chase, pounce, and bite. A bitten dummy may become infected and capable of conversion, so contact with the graveyard can change the session faster than expected.
For a ragdoll reality solo guide, the practical approach is to observe from a safe distance before throwing anything. Check the speed class, keep a path away from other dummies, and avoid creating several converted enemies at once. Fast zombies deserve the most space because their approach compresses your reaction window.
| Zombie class | Practical concern | Suggested response |
|---|---|---|
| Slow | Long chase | Use controlled distance and test a hit |
| Normal | Balanced approach | Preserve an escape lane |
| Fast | Short reaction window | Prioritize distance over damage |
| Infected dummy | Possible conversion | Isolate and observe before further contact |
Because the official information does not publish exact zombie health, bite damage, or wave population, avoid inventing fixed survival thresholds for your ragdoll reality getting started run. Treat the documented slow, normal, and fast zombie classes, chase, pounce, bite, and infection behavior as the reliable framework. A practical test is to convert one dummy, record how the zombie approaches, and compare it with the table before adding another; this reveals useful thresholds without turning unverified numbers into facts.
Common First-Session Mistakes to Avoid
Even a strong ragdoll reality getting started routine can be disrupted by a few predictable errors. Most beginners change too many variables during one encounter, such as weapon loadout, defensive equipment, movement path, and extraction timing, making it impossible to identify what caused the outcome. A large enemy reaction may also look impressive but not indicate effective damage: stagger can interrupt a dangerous combo without removing the attacker, while a quieter hit may secure a longer opening. In the early solo survival loop, test one change at a time and judge each attempt by whether the encounter becomes safer and the route to the extraction point becomes more repeatable.
Mistake one: changing everything at once
Switching to a new weapon, a moving dummy, or a different limb target changes the variables that determine whether a hit actually lands, so a failed attack becomes difficult to diagnose. Keep the weapon, distance, approach angle, and target fixed while practicing; for example, test one limb against the same stationary dummy until the timing is reliable. Only then change one variable at a time, recording which adjustment improved accuracy or control in Ragdoll Reality.
Mistake two: chasing every fallen target
A downed or detached-looking dummy may recover, move, or trigger another interaction, so check the body-ragdoll state before rushing back in. In Ragdoll Reality, a limp torso can still react if the encounter script has not switched it into a disabled state, while a detached limb may continue generating physics collisions near your route. For example, backing away after a dummy falls can leave it outside the trigger radius, preventing its follow-up grab or counterattack from catching you during the next doorway crossing. Confirm that the target is inactive, then use the opening to reposition; otherwise, a greedy attack can become an avoidable counterattack.
Mistake three: treating the tower as a shortcut
The 80-stud tower adds vertical movement to an already physics-heavy environment, so treat it as a route-planning problem rather than a shortcut. Before committing to the climb, practice ragdoll momentum, grab timing, and controlled retreat on level ground; a failed ledge attempt can turn a manageable ascent into a long recovery. Approach the tower in stages, secure each platform, and test your retreat route from the first checkpoint before attempting the upper section.
Mistake four: activating the Horde without a route
The Horde button starts wave survival, but spawning several threats in an enclosed area removes your ability to kite. Identify at least two exits, understand how you will avoid a corner, and begin with the goal of surviving rather than clearing every wave.
Mistake five: relying on community claims as fixed rules
Community reports can suggest weapon behavior, unusual reactions, or effective strategies, but they should be checked against the current version. The official page provides the most reliable foundation for the game’s listed mechanics. Mark unverified observations clearly and retest them if the game changes.
For early sessions, a useful test is to record the exact setup behind a community tip—such as the weapon, encounter, reaction, or sequence of actions—then compare it with the official mechanic. If a claimed exploit does not reproduce consistently, treat it as anecdotal rather than a rule. The beginner mistakes guide complements this session plan by identifying habits that can quietly undermine otherwise effective practice, helping solo players build reliable methods for the ragdoll reality survival guide without depending on unverified community claims.
Your First-Session Takeaway
The best Ragdoll Reality getting started strategy is methodical: test one body area, change one variable, record the reaction, and keep an escape route before attempting a crowded encounter. Dummies reveal location-based effects, weapons differ in practical handling, and the tower, graveyard, and Horde become easier when basic movement is already under control.
By the end of the session, you should have one dependable weapon, a clear understanding of which targets cause the strongest reactions, and a tested route for escaping aggressive dummies. That combination provides a solid basis for the first-hour plan and makes every later experiment faster because you no longer need to relearn the basic control loop.
Frequently Asked Questions
Is Ragdoll Reality played in single-player?
Yes. The official Roblox game page lists a maximum of one player and no enabled VIP servers as of October 25, 2026. You can therefore complete the core dummy, weapon, tower, graveyard, and Horde activities alone, which makes this ragdoll reality single player guide practical for testing techniques at your own pace.
What should a new player test first in Ragdoll Reality?
Test a stationary dummy before trying moving enemies or hazards. Aim at a selected limb, watch the reaction, and repeat from the same distance. Then change the weapon or target area while keeping everything else constant. This simple process teaches location-based damage and gives you a dependable baseline for later comparisons.
How can a solo player survive aggressive dummies?
Create distance before attacking, make one controlled strike when an opening appears, and retreat during the recovery animation. Keep an escape route behind you and avoid corners. Because dummies can fight back and recover, a steady retreat-and-counter approach is often safer than repeatedly attacking without resetting your position.
Are zombies dangerous during a first session?
Zombies can chase, pounce, and bite, while the graveyard can convert a thrown dummy. The official page lists slow, normal, and fast zombie classes but does not publish their health, bite damage, or wave counts. Keep distance, isolate converted targets, and avoid activating the Horde until you understand how you will escape the area.
Which weapon should a beginner use first?
Choose the weapon that gives you the most accurate and repeatable contact, even if it is not the most dramatic. Test several options against the same stationary dummy, measuring reach, aim, and recovery. A dependable short-range tool can be safer than a powerful attack that leaves you unable to retreat before the dummy gets back up.